How to Set Up a Firewall with UFW on Ubuntu 18.04
Introduction
The first step in securing your system is configuring a firewall. To set up and manage your firewall, Linux has designed iptables, a flexible firewall utility.
Users who are new to network security may find iptables a bit intimidating. That’s why we recommend starting with UFW. UFW (Uncomplicated Firewall) is a user-friendly interface implemented on top of iptables. It provides a simple way to configure a firewall.
In this tutorial, you will learn how to set up firewall protection of your Ubuntu 18.04 system with UFW.

Prerequisites
- A user account with sudo privileges
- Access to a command line/terminal window (Ctrl–Alt–T)
Set Up UFW from Command Line
Install UFW on Ubunutu
UFW comes pre-installed with Ubuntu 18.04.
In the unlikely case you do not have UFW, run the following command to install it:
sudo apt install ufwConfigure UFW to Support IPv6
If the system has both IPv4 and IPv6, you need to modify the UFW configuration file to support both protocols.
Open the file using Nano or any other text editor:
sudo nano /etc/default/ufw
The IPv6 value should be set to yes.
Save and close the file.
Set Up Default UFW Policy
The default UFW configuration is set to allow all outgoing connections and deny all incoming connections.
These rules work fine for personal computers which do not need to respond to incoming requests.
If you want to return to the default settings, run the following commands:
sudo ufw default deny incomingsudo ufw default allow outgoing
Allow SSH Connections
If you plan to connect to your server from remote locations, you need to set up UFW to allow incoming SSH connections.
Configure UFW to allow SSH connections with the command:
sudo ufw allow ssh
Enable UFW
After you have configured the firewall to allow SSH connections, you can enable it with:
sudo ufw enableThe output will inform you that existing SSH connections could be disrupted by enabling the firewall. Confirm you want to proceed by typing y and hitting Enter.
The output should inform you that the firewall is now active, as in the image below:

Check UFW Status
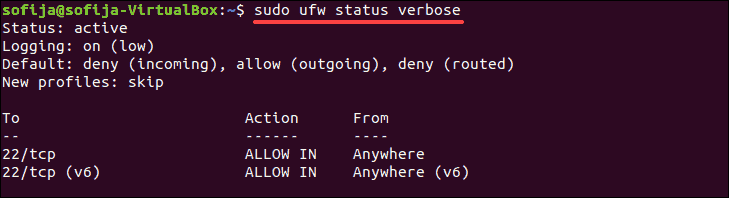
To check UFW status and then set rules run the command:
sudo ufw status verboseYou will see its status, the default settings, and which ports are open for connection as in the image below.
Adding More UFW Rules
You can add more rules to further define the extent of communication the server has.
Specify which connections are allowed and which are denied.
Allow Incoming Connections on Other Ports
Depending on what you use the server for, you may need to open some other ports to allow specific incoming connections. Create additional UWF rules to add these connections to your firewall configuration.
Set your server to listen to HTTP (on port 80) by typing:
sudo ufw allow httpOr:
sudo ufw allow 80To enable HTTPS connections, use one of the following two commands:
sudo ufw allow httpssudo ufw allow 443You might be using the server as a remote machine to which you want complete access from your home system. To set a rule that allows access to all ports from a specific IP address, run:
sudo ufw allow from [IP.address]To allow access from a particular machine to a specific port run the command:
sudo ufw allow from [IP.address] to any port [port number]To allow access to a range of ports, specify the range values and the type of protocol (TCP or UDP). For instance, the following command will allow connections from ports 2000 to 2004 for TCP and UDP:
sudo ufw allow 2000:2004/tcpsudo ufw allow 2000:2004/udpNote: TCP (Transmission Control Protocol) is a connection-oriented protocol used to guarantee that all the data transmitted is in order. UDP (User Datagram Protocol) is a connection-less oriented protocol that transfers data faster, but is not as reliable.
Deny Incoming Connections on Other Ports
To create a deny rule to forbid connection from a specific IP address run the command:
sudo ufw deny from [IP.address]You can also deny access to particular ports by typing:
sudo ufw deny from [IP.address] to any port [number]Delete UFW Rules
If you want to delete a rule you no longer need, there are two ways to do so.
One option is to display a list of all the rules and find the assigned number of the rule. First, run the command:
sudo ufw status numbered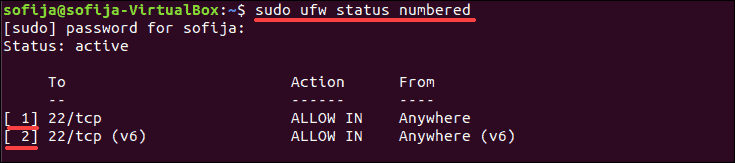
As in the image above, the output will list the rules you have defined so far. Each rule has a number according to the order in which it was set.
To delete a rule, use the following syntax with the appropriate rule number:
sudo ufw delete [rule_number]An alternative way to delete a rule is to specify it word for word (as you added it):
sudo ufw delete [rule]For example, to remove a rule that allows connection to port 2000, use the command:
sudo ufw delete allow 2000Application Profiles
Each package installed with the apt command has an application profile in the /etc/ufw/applications.d directory. The profile provides information about the software and its UFW settings.
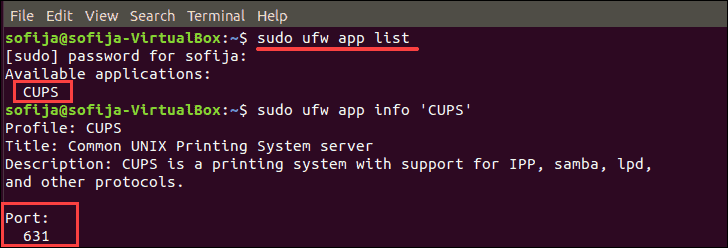
To see a list of all application profiles use the command:
sudo ufw app listSee more information about a specific package (along with open ports) by typing:
sudo ufw app info '[package name]'In the example below, there is only one application profile – CUPS. The app info option shows you that the package opens port 631.
Set Up UFW Via GUI
Install GUFW on Ubuntu
If you prefer managing your UFW firewall over a graphical user interface, you can install GUFW.
This can be done by running a few commands in the terminal or by using the systems software center.
Option 1: Install GUFW Via Terminal
1. To set up GUFW, you first need to enable the University Repository. To do so, type in the following command in the terminal:
sudo add-apt-repository universe2. Then, update the repository:
sudo apt update -y3. With everything set, you can install GUFW by running the following command:
sudo apt install gufw -yOption 2: Install GUFW Via Software Center
For users who want to stay away from the terminal completely, another option to install GUFW is downloading it from the Software Center.
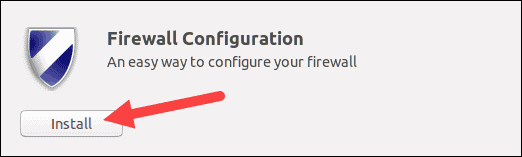
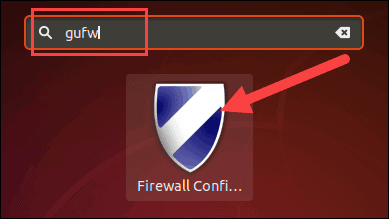
1. Open the Software Center and type GUFW in the search bar.
2. The search results will display the Firewall Configuration package. Select the icon and click Install.
Open and Get Started with GUFW
To open the Firewall Configuration, use the search bar on your Ubuntu system and type in GUFW.
Click on the icon that appears as in the image below.
This launches the Firewall window. In it, you will notice a menu with different parameters you can set according to your needs.
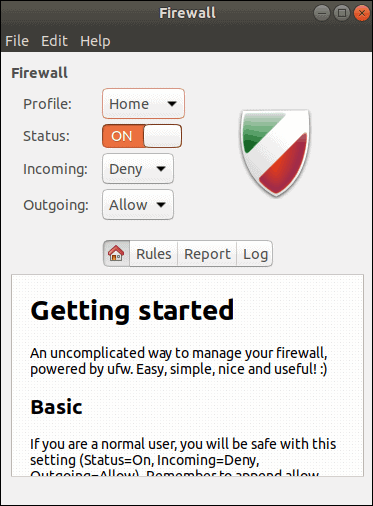
As the instructions imply, if you are a normal user the Basic configuration should suffice your needs. This includes:
- Profile: Home (or any of the other names offered)
- Status: ON
- Incoming: Deny
- Outgoing: Allow
If you want to add rules and label them for future use, click Rules and then the plus sign (+).
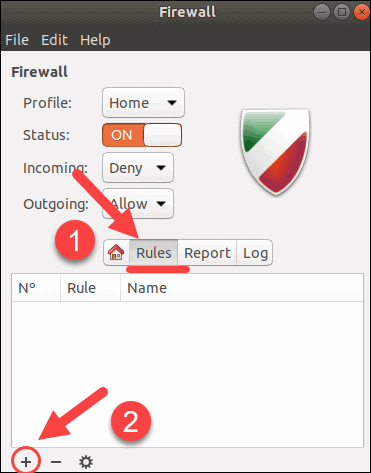
A pop-up window Add a Firewall Rule will appear. Configure the new rule and click Add.
Conclusion
By following the instructions in our guide, using UFW to set up a firewall should be simple. Ensuring stable firewall protection is the least you can do to protect your server.
